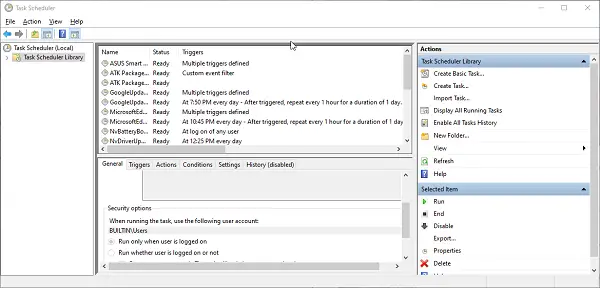
Task Scheduler Tasks not running Tasks
Task Scheduler stops automatically
The Task Scheduler is used by the OS to schedule all the background processes, launch applications and manage them. The method used behind is that the schedular calculates all the resources required by any process to get completed. It creates the queue of such processes according to their requirements and priority. When everything is set, all the tasks are then sent to the processor to get executed. It works based on time and memory consumption. Adding to it, anyone can create their own tasks and schedule them. By now you may have understood that the proper working of the Task Scheduler is a necessity. If you are facing a certain error as Task Scheduler is not working, then it might be a problem for you. It is because of all of your background tasks, ongoing tasks, and upcoming tasks are clashing and making your machine to freeze again and again.
Scheduled Tasks not running
Let us now understand why it isn’t working and what can be the possible method to solve the issue. Before we start, let’s assume that you have installed any driver or application by downloading it from an unreliable source. Now the possible reasons for error can be, faulty registry entry, corrupted application, etc. Other reasons could be, disabled service of Task Scheduler, absence of admin rights, corrupted tree cache used by the scheduler. You may not know which of the mentioned reason is behind the error on your system. This means you may have to follow each and every method mentioned in the article below. Please keep in mind that you have to restart your system after the completion of each method. And before you begin, remember to create a system restore point first.
Task Scheduler not running, triggering or starting programs
If the Task Scheduler stops automatically or is not running or working on your Windows 11/10 system, you need to do the following things:
Task Scheduler failed to start task for user
1] Check and start Task Scheduler service
This is the most simple step one can perform. Checking Windows Services, restarting them is one of the basic things that even your system admin will also perform without a doubt. Press Win + R keys. The Run dialog box will appear. Type services.msc and press enter. The Services Manager window will open up. In the list of Services search for Task Scheduler. Right-click on it and select Properties. A new window will open up. Check the new window whether the Service status is set to Running and Startup type is set to Automatic. If not then change it to the same. Next press the Start button. Click on Apply then on OK. Here you go, your error should get resolved. But if your service was already running as shown in the screenshot, then move to the next method.
2] Change the Service configuration
If the above method fails to start the Service, then try this method. Open Start Menu and type cmd. Select Run as administrator from the menu.
Type “SC config schedule start= auto” and press Enter. If the final message you get is [SC] Change Service Config SUCCESS then the scheduler will start working. Restart your system and you are good to go. Read: Scheduled Tasks running forever, randomly, or multiple times
3] Start Task Scheduler using Command Prompt
If the above method didn’t work and your service is still not working then you can enable it using Command Prompt or Windows PowerShell too. Press Win + X keys. A Quick Access menu will open up. Select Windows PowerShell (Admin) or Command Prompt (Admin) from the list. Type “net start task scheduler” and press Enter. This should get things started.
4] Run System File Checker
Now that you know the service is running properly, you can go with this method. Running System File Checker looks for potentially corrupted system files, repairs and maintains them. Press Win + X keys. A Quick Access menu will open up. Select Windows PowerShell (Admin) or Command Prompt (Admin) from the list. Type “sfc /scannow” and press Enter. You will know when the process is completed and check whether the scheduler is running now or not. If not then you may go to the next method.
5] Delete the corrupted Task Scheduler Tree Cache
This method is a bit lengthy, go through the steps one by one and you may find that the error is no more. Press Win + R keys. The Run dialog box will open up. Type regedit and press Enter. Go to the following Registry key: Right-click on the Registry and rename it as Tree.old. Go to Start search and type Task Scheduler. Click on the application, it should work now. If it does then go through the following steps to find out what was stopping it. Revert the changes you made previously. Rename the registry as Tree. Now, open the Registry hierarchy. Start renaming each key to keyname.old. Now try running the Task Scheduler. Keep doing Step 2 until you find the key due to which the scheduler was showing error. Once the culprit is found, right-click on it and select Delete. Restart your system and see.
These were some of the methods you can try to overcome the problem of Task Scheduler. Make sure to revert any changes you made to the system if any of the methods didn’t work for you.

